The Fundamentals of Bike Fitting
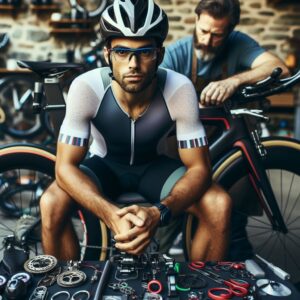
A good bike fit optimizes the contact points between you and the bike: the saddle, the pedals, and the handlebars. A poor fit can lead to decreased power output, increased fatigue, and potentially even injury, leading to derailment of your Ironman goals.
If the frame is too large, a cyclist may stretch too far to reach the handlebars, leading to overextension and lower back strain. A frame too small can cause cramped positioning, leading to knee pain and inefficient breathing. Frame size is generally determined by the height of the rider, but individual proportions such as torso length and arm reach also play a necessary role. Frame geometry, the dimensions that make up the frame’s design, impacts how the bike handles and should be considered alongside size.
The height of the saddle is critical to ensure proper leg extension during pedaling. Insufficient extension can lead to increased fatigue, as the rider is not able to leverage the full power of their leg muscles. Overextension, where the rider’s leg is almost fully straight at the bottom of the pedal stroke, can lead to hip rocking and discomfort, potentially causing injury over time. To find the appropriate saddle height, a starting point is to have a slight bend in the knee when the foot is at the bottom of the pedal stroke.
The position of the saddle, both in terms of its fore/aft placement and tilt, affects the rider’s reach to the pedals and handlebars and the angle of the hips and pelvis. Moving the saddle forward can increase the engagement of the quadriceps while shifting it backward puts more emphasis on the hamstrings and glutes. The tilt of the saddle should allow the rider to sit comfortably without feeling like they are sliding forward or backward, keeping the pressure even across the seatbones.
The distance to the handlebars, referred to as reach, and the height of the handlebars relative to the saddle, affect the rider’s upper body positioning. Reach and handlebar height need to be set in a way that the rider can maintain a comfortable and sustainable position with minimal strain on the neck, shoulders, and back. A longer reach can encourage a more aerodynamic position, but it may compromise respiratory efficiency if the torso is too compressed. Adjusting the stem length and angle can fine-tune the handlebar positioning for the rider.
The placement of the cleat on the cycling shoe influences how the foot engages with the pedal. Proper cleat positioning can ensure efficient power transfer, reduce the risk of knee injuries, and help in maintaining a stable and centered position on the bike. The cleat should be positioned so that the ball of the foot is over the pedal axle, allowing for a natural and powerful pedaling motion.
A Step-by-Step Guide to a Custom Fit
The process begins by obtaining precise measurements of your body. Key metrics may include your height, inseam, arm length, shoulder width, and flexibility. These initial assessments provide the fitter with data to make educated adjustments to the bike, ensuring that the setup complements your unique physical attributes.
 Before adjustments, a comprehensive interview is conducted to understand your cycling habits, goals, past injuries, and pain points. This conversation informs the fitter of any specific needs you may have, such as a preference for a more upright position due to back discomfort or special considerations for previous knee injuries.
You will be placed on the bike, and initial adjustments will be made to the saddle height and position, handlebar reach and height, and cleat setup. These adjustments are based on both the biometric data and industry standards tailored to your goals and riding style.
While you pedal, the fitter observes your posture, pedaling technique, and body movements. At this stage, advanced tools such as motion capture systems may be used to gather detailed information on your biomechanics while you are in motion.
The data from the dynamic analysis leads to further fine-tuning. These refinements ensure that every aspect of your position is optimized for efficiency, comfort, and power output. Adjustments can be minor, such as a few millimeters change in saddle height or cleat position, but even these small tweaks can have a substantial impact on your riding experience.
After the fitting session, you will take time to adapt to your new position through regular training rides. A follow-up appointment is typically scheduled to reassess the fit after you’ve had a chance to acclimate to the changes. Feedback during this session is critical to making any necessary corrections or further refinements.
Your body changes over time, and so does your fit. Regular reassessments are recommended to ensure that the fit remains optimal. This approach allows for adjustments in response to increased flexibility, changes in bike technology, or evolved cycling goals.
Aerodynamics vs. Comfort
When an athlete is more aerodynamic, they can move faster for the same amount of effort. This is often accomplished by lowering and elongating the rider’s position on the bike to reduce the frontal area exposed to the wind.
Holding a low, forward-leaning pose for several hours can strain the neck, back, and hamstrings, reducing overall efficiency and performance. If a rider cannot maintain their aerodynamic position, any potential speed gains may be negated.
Comfort is about finding a position that is sustainable for the duration of the 112-mile bike leg of an Ironman. This usually means a slightly more upright position and a well-fitted saddle that allows for better weight distribution and reduced pressure on sensitive areas.
A comfortable position helps maintain consistent pedaling efficiency and reduces the risk of injury. It is psychologically beneficial, as discomfort can lead to a negative mindset that affects overall performance.
The answer to balance between these two elements lies in incremental adjustments and careful testing.
Ensure that the bike fit allows for a natural riding position where the body isn’t under constant strain. The Ironman bike leg is about endurance, and sustaining a comfortable yet efficient position is key.
You can experiment with more aerodynamic adjustments. This might mean lowering the handlebars or bringing them closer to reduce your frontal profile. These changes should be made gradually, and the effects on comfort and pedaling efficiency should be monitored closely.
Not everyone can sustain a fully aggressive aero position, and that’s OK. The goal is to find a position that is as aerodynamic as possible without substantially compromising comfort.
Aerodynamic testing such as wind tunnel sessions or computational fluid dynamics simulations can give you precise feedback on how changes affect your drag coefficient. These tests should be balanced with real-world riding to ensure practicality and comfort.
No matter what the data says, your body’s response to a position change is the most telling indicator of success. Ensure that any aero gains do not come at the cost of increased fatigue or discomfort that could outweigh the benefits when transitioning to the run.
